Published
- 13 min read
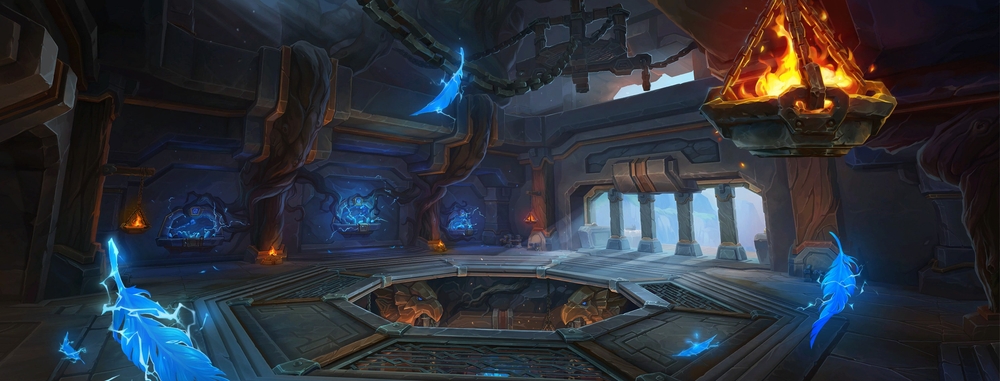
A Complete Guide to the Rookery
Intro
Cover image for this article sourced from Wowhead
Timer - 29 Minutes
This is a short and moderate experience with fairly easy bosses. It is fairly linear with little routing choices available.
Melee are a bit of a detriment here. If it allows, you may consider wanting to bring an extra magic dispel, or someone who can dispel curses.
This guide is focused on providing a complete understanding of the dungeon at a base level of +10, and the warnings I provide will focus around such. There is still plenty of knowledge to be gained here even for more advanced players, and everything here still applies to lower keys, but you should approach comprehension with this in mind.
Trash to Kyrioss
You will go over the count required pulling anything extra, generally speaking, in this dungeon. The route I would advise you going starts with you going straight forward, engaging the mini-boss and the pack guarding the Stormrooks, and lusting.
After this, you will need to clear the entirety of the room before you engage the first boss. It will automatically aggro all mobs still remaining upon entering the intermission.
I will introduce you to every type of mob you will encounter in this first area, and the abilities they possess.
- Quartermaster Koratite - A rather simple mini-boss, but still deadly nonetheless. He possesses two abilities: Bounding Void and Entropy Shield. Bounding Void is a frontal at a random player that sends out three orbs, dealing lethal damage to any player hit. The orbs will go out a fair distance, then return to him. Entropy Shield is a frontal damage nullification that forces you to attack him from behind. Ranged can stand on the bannister you jump down from to be safe from this lieutenant completely, and not have to move.
- Bounding Void

- Cursed Rookguard - As of now, this does nothing but melee, and not terribly hard. Has as much health as a regular mob.
- Cursed Thunderer - One of the more deadly mobs in this area if pulled in great number. These only do a single cast called Lightning Bolt, that deals heavy damage to whoever they successfully cast it on. This is a high priority kick in any pack you pull them in. Be wary that some of them possess a buff called “*Lightning Infused” which grants them cast speed. You should dispel this as soon as you can if you have the utility to do so.
- Cursed Rooktender - These do nothing but occasionally cast Lightning Surge, which enrages any Unruly Stormrooks nearby, causing them to do increased damage and attack faster. As of now, this honestly isn’t particular devastating if it gets off. It will attempt to re-cast this through stops, also.
- Unruly Stormrook - These will cast an ability every so often called Energized Barrage, which deals very high damage in a channel over 3 seconds. This mob is immune to stops, so you must simply heal through this damage.
- Voidrider - This is a lieutenant mob that possesses two abilities: Wild Lightning and Localized Storm. Wild Lightning is a short cast that spawns a wealth of swirlies to dodge, which you should easily avoid. Localized Storm is a channeled AoE, non-interruptible, that does a high amount of damage over 5 seconds. Defensives and group-wide damage reductions are quite useful for these casts.
- Wild Lightning

- Localized Storm

Kyrioss
This is a relatively easy encounter that revolves around spreading out and dodging various lightning-styled mechanics. There is very little outgoing damage to speak of.
- Wild Lightning - Kyrioss summons wild lightning on players, spawning a large number of swirlies to dodge that deal very high damage.
-

- Crashing Thunder - Kyrioss afflicts the entire party with impending lightning, and after several seconds each player will take a moderate burst of damage to themselves and anyone else within 8 yards.
-

- Lightning Torrent - Upon reaching 100 energy Kyrioss will dash to the middle and begin charging four beams that will then revolve around the room in either direction. Smaller clumps of Wild Lightning will spawn during this phase to dodge as the beam rotates.
-

- Lightning Dash - Kyrioss finishes the Lightning Torrent with this, dashing to the furthest player after a short time, dealing massive damage and knocking back anyone still there.
-

Strategy
- As I mentioned, this is a fairly easy fight. You can tank this anywhere in the room as long as you have fully cleared it, and I recommend tanking it a little bit past the grates so that there is ample room for everyone to spread for the Crashing Thunder. Sometimes, the Wild Lightning, can block your path to the boss, but you should choose life in these cases. He will do 2 rotations of these two abilities before going to the middle to cast Lightning Torrent.
- The entire group should try to remain together to make the healer’s life easier here. Simply rotate with the beam and continue dodging during this phase, then dodge the Lightning Dash when he chooses his landing spot. You are still able to hit the boss during this part of the fight. He will then repeat these abilities for the rest of the encounter.
Trash to Stormguard Gorren
This is overall the hardest part of the dungeon in terms of trash. The Oracles combined with the Diffusers can make for an incredible amount of outgoing, unavoidable damage. You will generally clear only the trash you need to in this area, besides the first pull in which there are packs you could choose to avoid.
- Cursed Rookguard - As before, these only melee and do nothing else.
- Coalescing Void Diffuser - The main lieutenant mob of this area. They have two casts, one of which is particularly dangerous. Attracting Shadows, which is a channeled AoE that pulses high damage while dragging in all players towards them, ending in a massive burst of damage to anyone too close, and Arcing Void, a moderate-length cast that places a debuff on a random target that, upon completion, explodes dealing damage to them and anyone within the radius.
- Attracting Shadows

- Arcing Void

- Void-Cursed Crusher - These melee fairly hard and cast an ability called Void Crush, which jumps to a random player and deals a moderate burst of damage to them and any players within 6 yards. You may use stops on this cast, but it will re-cast afterwards.
- Corrupted Oracle - These will cast Void Bolt, an interruptible cast that deals high damage and is high priority (as there are little other interruptible casts in this area), and Seeping Corruption. Seeping Corruption places a high damage Curse on a random player, causing them to spawn a swirlie under their feet that erupts a second or so later every 2 seconds.
- Afflicted Civilian - These do nothing until they die, at which point their bodies will erupt with Instability, causing high damage to anything still within their radius after a short time.
- Instability

Stormguard Gorren
You will want to lust this. This is a short and overall simple encounter. When played properly, it is simply a healing check. However, it can go south very quickly and is incredibly punishing on mistakes.
- Crush Reality - Gorren will leap towards a random player, preferring ranged, and deal lethal damage to anyone he lands on after a short moment. This also does a blast of moderate damage to the group. The area he landed on will be covered in Lingering Void, which does high ticking damage to anyone caught. Reality Tears will also be ejected shortly after, sending four tornadoes out to dodge, which also deal very high damage to anything hit.
-

- Chaotic Corruption - Gorren will afflict a random player with this debuff, dealing high damage over its duration. This DoT has 4 charges, and will keep jumping to the nearest player until it is fully expended. When it jumps, it will scar the player who had it with Chaotic Vulnerability, increasing their damage taken from it by 300%, stacking.
-

- Dark Gravity - Gorren will cast this shortly after all charges of Chaotic Corruption have been expended, dealing moderate ticking damage and pulling players towards him. Anyone near him when the channel completes will take lethal damage.
-

Strategy
- Regardless of composition, you should start with the boss on either the right or left side, slowly filling up the room as the fight progresses.
- If you only have one ranged, it makes it fairly easy to guarantee the baits for Crush Reality. If you have multiple, they should all head to the spots that make the most sense for baiting that ability.
- You will want to pass the Chaotic Corruption from DPS->Tank->Other DPS->Tank. As there isn’t much tank damage on this fight, this makes it much easier on the party as a whole. If someone accidentally receives the DoT twice that is not the tank, they will need a personal/external, or they will die.
- One of the DPS Corruptions will line up with a Crush Reality. They should personal this or likely die.
- I prefer to tank the boss near the bait spot, as the tornadoes are not too difficult to dodge and this ensures much higher uptime for the melee and prevents the baiting players from having range issues with anyone. It also makes it easier to pass around the debuff.
Trash to Voidstone Monstrosity
This area is overall easier than the previous, but still has some nasty pulls and you can quite easily die if you lose focus.
- Void Ascendant - This is a lieutenant mob that will cast two abilities: Feasting Void and Umbral Wave. The first is a moderate cast that will pulse moderate ticking damage to the group over a long period. Umbral Wave will spawn several waves of orbs that deal lethal damage to the player they touch.
- Umbral Wave

- Void-Cursed Crushers and Afflicted Civilians make a return
- Consuming Voidstone - The other lieutenant mob in this area. They have 3 abilities of note. The first is Volatile Void, a passive that causes their auto-attacks to cleave to anything within 3 yards of their target. The second is Void Extraction, which after a cast will siphon power from nearby allies, weakening them but increasing the Voidstone’s damage done. Lastly, as they fall to low health, they will cast Unleash Darkness, channeling until death, causing swirlies to appear beneath players that erupt, dealing lethal damage a short moment afterwards. This also does a moderate amount of damage to all players with each set of swirlies spawned.
- Unleash Darkness

Voidstone Monstrosity
This is a fairly easy encounter overall. The boss begins with a shield, and after breaking that shield is stunned and takes massively increased damage, at which point you should use your cooldowns.
- Oblivion Wave - The Monstrosity will cast this on his current target, dealing a large amount of damage to them and anything behind them as indicated by the visual.
-

- Unleash Corruption - The Monstrosity will place two high damage magic DoTs on two random non-tanks. Upon removal, this leaves a slowly expanding pool of Seeping Corruption.
- Null Upheaval - The boss will smash the platform, knocking all players back and dealing moderate damage to them. He will then eject three Voidstone Fragments in semi-random locations around the arena, and spawn a large amount of swirlies. Each Fragment left un-touched, evolves into a Voidstone Awakened, which are regular mobs that pulse very high damage to the group.
-

- Stormrider’s Charge - An NPC that flies above granting everyone but the tank (if all players are alive) 100% movement speed and a buff that, upon expiration, destroys any Fragments within the indicated radius.
Strategy
- As even a single Voidstone Awakened will wipe you without massively overgearing the key level and using CDs, it is necessary to divide the group up in order to be able to destroy each Fragment. As mentioned, there will always be 3 Fragments, and their locations seem to be static as of current writing.
- You will want the tank on either side, planted towards the very edge of the platform. They should never be an obstacle for any other player to encounter in this regard, and the majority of tanks can be entirely self-sufficient for this fight.
- Fragments can spawn in doubles in one section, or equally distributed througuhout. You should generally assign 1 non-tank to each section (left, middle, and right) before the pull. The last person can float. (Outdated, but haven’t tested the fight enough since it was changed to confirm 100%.)
- In the event two Fragments spawn on one section, there is also this caveat: the double can spawn close enough that one player can destroy both, or far enough apart that two players are required. This is where the floater must truly pay attention, and pings or other communication should be used in this event. (Outdated, but haven’t tested the fight enough since it was changed to confirm 100%. Leaving just to keep in mind.)
- The swirlies will cover the Fragments until around 3 seconds left until the Stormrider’s Charge ends. You should never try to walk through the swirlies to detonate them, knowing this, as it is unnecessary and will likely result in your death.
- The healer should instantly dispel one of the Seeping Corruptions, and the other one will likely time out naturally. Both players with the debuffs should be aware of their positioning so they can place the pools as far out of the way as possible.
Routing and Lust Recommendations
Lust should be used on the first pull, then Stormguard Gorren, and finally on Voidstone Monstrosity, during a shield break. Alternatively, you may choose to use the second lust on the double Diffuser pull before Stormguard Gorren.
This is the route I recommend in a PUG. You may choose to break up the first pull if it’s a bit intimidating to you. It also may show an Oracle in the double Diffuser pack, but that mob has been removed as of my most recent testing.
!9z12UXjmq0)OkF)YRvvQQPsBVqEOpHcxStiHSeTbs3kvLV9UyB8GXS9fVSW4ZCMZC8aL4YBllgQF00m(6LlhllA7S2UMP(X)uEaJ(aQS43gZtLhiZx(wv)KzElntNozoo(PPJ3Bgo(L2ZxcgRMd5vt)fW6go6Hle43N67VeYCaJgZZDhVV8Gd8tD2XVzTVAwY)lxIC(sxWx(H6)z(Foo4xOXfwCHhxKZlILLr)EwaHNaYymrUhID3QOzOF4uzHWsqu9kasidaKFxowS80DsmjegF19cuqKDRfkiRAQ5TZXqZPageeIihCCo4YeWBKKM21upHUma8anxNBkc0XuvRIPys7kYW3O(B4e0Af5PXzbbSv1CClBfcRJvhbsLlgS8eZZ7rY8ozAXr4nmUR4K5sgoHaE)jjTaq111e68(vHnsVAU4ARq54JENEpfApYy2WI4Xbsqe0BoaTk152neb1YD0Zj8BZzqEK5IOkxQ1xnlkJSPw5Ys4WNCtpiXpOZWEbiMLiSchqKCGyB9dQD7vYCxhjnnT6wPYRkHOu5kG()yPJUhCLw4SV4flgAJk53gl(xEALWtgT51kz08RwvS4RBIPOkBl3f0YreCMljYzkwinUGf7WzOuD3oydHIadvbooz0topXDuWZCV71vjyfa5E2omijyEcFRTnQaFL7PXWgPC4vjW5gQmsyQksyQosygksywyelMCvVUgxrBDdWXQDOddgHZGMod66mb4cOr6WGgpd68Cuu)4W0Zdm1o6Na0VG8M4b2CaqH0n(G07ueCf43fXIqiJfHqbExnyErGfghlcjjwes6oml9vywMXYACJXr5taWWRewE7BQ5D1Zb3lbCVeW9gMjK2RtpxH0CuLBobbVJmjwnwa(kgb8zmc47ye8DY2EnQ0bmvnMk)arIFJrQP02M5haFtwXuDV5ntFSkgnNVSE7dM3V7Nddpzo9N3V7VVFxr3ZV0BklEUTBgq7jJ5HH(2Bg6oAAlRH7e(aVAZ9tD9UpXla8uxBzXn)6Jp(d8nNp)1pF5EL)daThis is the route I recommend in a more advanced group.
- Same thing for now.
Skips
-
Listed here are demonstrations of any pertinent skips I am aware of.
-
You may use movement abilities like Disengage or Glide to land on the outstretched pier at the entrance to the third area, but as of yet I am not aware of any route that makes use of this.
Profession or Dungeon Buffs
- While falling to the second area of trash (after Kyrioss is dead), if you use your ExtraActionButton to dash to a Chained Stormrook you gain a buff that provides AoE damage for some time. This doesn’t seem to scale with key level, but it’s still free damage.

Respawn Locations
- Entrance
- Start of Trash to Stormguard Gorren (Bottom of the pit you jump into after Kyrioss).
- After you kill Stormguard Gorren, you’ll still respawn in the same place as the above, but you can go left instead of down the hallway to Gorren for a shortcut to Voidstone Monstrosity trash.
Table of Contents
- Operation Floodgate
- Darkflame Cleft
- Operation: Mechagon - Workshop
- Cinderbrew Meadery
- Theater of Pain
- Motherlode
- Priory of the Sacred Flame