Published
- 18 min read
A Complete Guide to the Motherlode
Intro
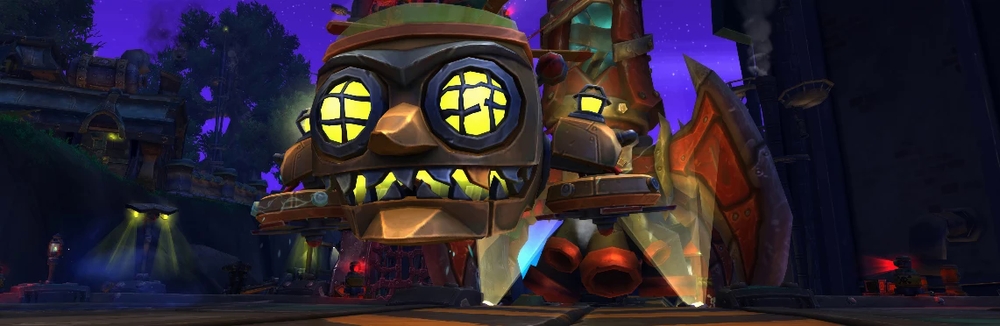
Cover image for this article sourced from Wowhead
Timer - 33 Minutes
This dungeon has seen quite a few changes, cumulatively speaking. Almost every section has been modified, even if only slightly. It should still feel largely familiar if you played its previous iteration. Overall, the difficulty has been reduced and focused into a few sections which, as this is one of the longer dungeons, can feel a bit frustrating. Still, it has large pulls and the potential for interesting routes.
Overall, this isn’t biased towards melee or ranged except for the second boss, which can be quite frustrating in a melee heavy composition.
This guide is focused on providing a complete understanding of the dungeon at a base level of +10, and the warnings I provide will focus around such. There is still plenty of knowledge to be gained here even for more advanced players, and everything here still applies to lower keys, but you should approach comprehension with this in mind.
Trash to Coin-Operated Crowd Pummeler
You will walk down a narrow (as narrow as an outdoor area can be) corridor, with mobs to either side before reaching a fork where you can chose to go left or right. I will advise going right at this fork in this guide. You may also choose to skip the Peacekeeper blocking the fork by doing a bit of parkour, which you can see in the Skips section
- Mechanized Peacekeeper - This is the lieutenant mob of this area. It has two abilities, but both are quite impactful. The first is Tear Gas, which fires 3 cannisters of said gas at random players over a few seconds. These leave a persistent ground effect that denies a large amount of space for a fair amount of time. The second is Charged Shield, which is a tankbuster that also places a buff on the Peacekeeper. While this buff lasts, any melees that the Peacekeeper lands will chain to the entire group, dealing high damage.
- Tear Gas

- Addled Thug - This mob has two abilities: Inhale Vapors, which is a cast that enrages the Thug, increasing their attack speed and movement speed. This can be interrupted or dispelled. The other is Uppercut, which has the Thug select a target player, charging to them and knocking them and anyone within 4 yards, dealing moderate damage as well.
- Uppercut
- Mech Jockey - This mob will alternate between melee and shooting their current target with Grease Gun, dealing moderate damage. Their main ability is Activate Mech, which will have them run to the nearest dormant Mechanized Peacekeeper and attempt to jump into it. As this mob is cc’able, you will want to do everything possible to stop this from occurring. It will continue to run to the Peacekeeper while alive, but if you allow it to begin casting Activate Mech and then CC it, it will cease its attempts.
- Off-Duty Laborer - These will cast Throw Wrench when pulled at a random player once and then begin melee’ing the target with the highest threat. This ability does very high damage and is not interruptible. When pulling these, it is best as a DPS and Healer to not enter combat until the casts have gone off, as it is very easy for multiple of these to kill you unless you use a defensive. If possible, use stops on these to prevent the damage entirely. Tanks should be careful when pulling multiple of these.
- Refreshment Vendor - These will melee and cast Iced Spritzer, a 3 second cast that results in a channel on a single target that deals high damage and stuns the player.
- Wanton Sapper - These melee and cast Mining Charge, throwing a bomb at a random player that then detonates after a few moments, damaging any players within 6 yards. At low health, they’ll cast Final Blast, destroying themselves and anything around them, and spawning a few mines after that.
-

- Weapons Tester - This will melee and cast Force Cannon, a non-interruptible frontal that deals damage and knocks back any players caught in the blast.
- Hired Assassin - These will cast Toxic Blades and Fan of Knives. Toxic Blades is a cast that grants the Assassin a buff that makes their auto-attacks, and Fan of Knives apply a poison on hit. Fan of Knives is a channeled, non-interruptible cast that deals high damage to the entire group.
Coin-Operated Crowd Pummeler
This boss hasn’t changed much at all, with only one ability being modified. The other updates are mostly to its visuals, which are well appreciated.
- Throw Coin - Footbomb Hooligans in the crowd will throw piles of coins throughout the arena at random locations near the boss. These do damage to anyone in the radius when they land, and do nothing else until interacted with by the boss.
-

- Coin Magnet - At full energy, the Pummeler will draw in any nearby coins, gaining a stack of Pay-to-Win, a 15% damage increase, per pile absorbed.
-

- Footbomb Launcher - Footbombs will be thrown into the arena throughout the fight, exploding after 15 seconds and dealing high damage, as well as applying a 25% damage taken increase. Players can click on these, punting the Footbombs directly forward. If the Footbomb makes contact as a result of players kicking them, it applies the 25% damage debuff to the boss instead.
-

- Shocking Claw - The boss will turn towards a random player, performing a long cast then slamming the ground in a cone, dealing lethal damage to any players struck, and stunning them if they survive.
-

- Static Pulse - After a cast, the boss will do moderate damage to the group and knock them back, applying a short DoT that deals moderate damage over its duration.
-

Strategy
- You can realistically tank this wherever you want, but I recommend starting on one edge of the arena. You will need to move the boss occasionally to get him away from the piles of coins, but only just before a Coin Magnet.
- If you are against the edge of the arena, you can simply let yourself be knocked against the wall for minimal movement for Static Pulse.
- It is best to play closer to melee if ranged, as it makes dodging the Shocking Claw easier.
- When Footbombs are launched into the arena, the tank should keep the boss still and not worry about aiding with knocking them in unless it is incredibly close. DPS and the healer should focus on this, and damage should be saved for when multiple stacks of the debuff have been applied.
- Make sure to move before Coin Magnet is cast. There is a visual displaying just how far he will vacuum in coins.
Trash to Azerokk
This is overall the most dangerous trash you will actually fight, as the Extractors are quite dangerous. The Wanton Sappers are retained from the first area. Anytime you fight an Extractor you want plenty of space and should be careful of the other packs, as it is easy to butt-pull them while dodging the various mechanics.
- Azerite Extractor - These are the most dangerous mobs in this area. They have 2 abilities, Puncture, which is a tankbuster which applies a hard-hitting bleed, and Rapid Extraction. This is a channel that does very high AoE damage to the entire group, launching swirlies that deal lethal damage to any player struck.
-

- Venture Co. Earthshaper - These have two abilities: Earth Shock, which deals light damage to a random player (and is instant), and Rock Lance, a channel that deals moderate damage up-front and then repeats that damage until stopped. High priority.
- Mine Rat - These are similar to the Off-Duty Laborers in that they cast a very high damage, non-interruptible ranged attack called Throw Rock at random players. These are in far higher numbers in this area however, and care should be taken not to pull to many without a solid stop rotation ready.
- Shalebiter - Cannon fodder accompanying the Stonefuries.
- Stonefury - These have two casts, which somewhat interact with each other. The first is Tectonic Barrier, an interruptible cast which protects the Stonefury from being interrupted. The second is Furious Quake, a cast that then turns into a channel which deals massive AoE damage. You will want to interrupt both if possible, but in the worst case you can dispel the barrier, or wait until Furious Quake begins channeling and use stops to disrupt it immediately.
- Fanatical Driller - These will cast Grease Gun, a light damage attack on their current target and melee.
- Taskmaster Askari - This miniboss guards the entrance to the next boss. He has several abilities and is slightly different from his original iteration. His first ability is Brutal Charge, where he will dash to a random player and deal a large amount of damage, slowing their movement speed by 25%. He will apply Heavy Slash to his current target on each melee, a moderate bleed that stacks and can be quite deadly around 5-6 stacks. He will also cast Massive Slam, which deals a near lethal amount of damage to anyone in its radius when it completes. Next, he will cast Overtime, empowering all nearby allies with 30% haste for 20 seconds, stacking for each second they remain near him. Lastly, at low health, he will Throw Shield at the tank for very light damage and pull out a second axe, increasing his melee damage by 10%. Do not be afraid to kite this if you begin taking excessive damage.
-

Azerokk
This boss was modified slightly, but plays largely the same. It still revolves around managing and controlling the adds and target swapping.
- Call Earthrager - On pull, two Earthragers will accompany the boss. These can be CC’ed by all effects which work on Elementals, as well as the Fracking Totems nearby. These will fixate on a player, preferring DPS and the healer, and attempt to melee them. If successful, they will apply a stack of Jagged Cut per successful melee attack, a hard-hitting bleed.
-

- Tectonic Smash - Azerokk will turn towards a random player, casting a large frontal cone that deals lethal damage and knocks up any player that survives the attack.
-

- Azerite Infusion - Azerokk will choose a random Earthrager, healing it to full health over 2 seconds and cleansing it of all CC, then empowering it. This Earthrager will now pulse damage to the entire group until defeated and deal 50% increased damage, but also takes 150% increased damage. If the empowered Earthrager is not defeated before Resonant Quake, it will emit an Azerite Aftershock, dealing lethal damage to the entire group.
-

- Resonant Quake - After a 5 second cast, Azerokk will deal a burst of moderate damage to the entire group and drop a pool underneath himself that deals high damage and slows any player inside of it. He will also cause any other Earthragers to echo this ability, as well as the aforementioned interaction with empowered Earthragers.
-

Strategy
- This can be a very tense encounter or very simple. It usually is nowhere in between. You will want to lust on pull.
- You will want to CC one elemental on the pull and begin the encounter by burning down the other one. There are Fracking Totems to facilitate this to your left if you do not have the required CC. This is because the boss has a much higher chance to empower the CC’ed add, and this gives you an opportunity to get rid of one Earthrager off the bat which will make the rest of the fight much easier.
-

- If the boss happens to empower the Earthrager you are already killing, you will need to keep the other one CC’ed and burst the empowered add down. As of writing, during testing the tank could taunt this add and it would quite reliably just melee the tank, greatly simplifying this stage of the fight. For now, I will recommend this until it is fixed or confirmed to work as intended.
- If the boss happens to empower the Earthrager you had kept CC’ed, you should immediately swap to it while doing your best to keep the one you were killing slowed and CC’ed. Cleave it down as best as you can while continuing to kill the empowered Earthrager.
- Try not to be too far from the boss unless absolutely necessary due to kiting, as this will complicate dodging the Tectonic Smash greatly.
Trash to Rixxa Fluxflume
This trash can be rather annoying but it’s fairly simple to execute.
- Weapons Tester - These will cast Force Cannon, a frontal that knocks back and deals high damage to anyone caught in it, and Echo Blade, another frontal with a 20 yard range that deals moderate damage and silences anyone hit for 4 seconds. Neither are interruptible.
- Test Subject - These are low health mobs that can be found in large numbers. They melee, and have a passive called Unstable Mutation, granting them a stacking 20% damage amp every 2 seconds they are in combat.
- Venture Co. Alchemist - These will cast Transmute: Enemy to Goo, which is a polymorph that lasts 10 seconds and is interruptible. They will also toss Caustic Compounds, a non-interruptible cast that throws a zone of toxic goo on the ground at a location.
- Venture Co. Mastermind - These are a lieutenant mob, and quite annoying to fight. They cast Mind Lash, which does moderate damage to a single player, and Brainstorm, which spawns several orbs which move about, doing very high damage to anyone they touch and silencing them.
-

Rixxa Fluxflume
This boss has been touched very slightly, but plays pretty much the same.
- Searing Reagent - This boss does not melee, but casts this at the highest threat target. This deals an incredibly high amount of Fire damage and is non-interruptible.
- Gushing Catalyst - Pipes around the arena overflow with Azerite, spraying it out onto the battlefield. This covers a very large area, and the pools of Azerite quickly expand, leaving only a small amount of safe area to stand on.
-

- Azerite Catalyst - The boss will select a player, firing a barrage of Azerite at them over 3 seconds. These swirlies turn into Azerite pools as well, further restricting the play space.
-

- Propellant Blast - Rixxa will select 3 players, one at a time, shooting them with a high-pressure blast of propellant, pushing them and any Azerite pools backwards. This deals moderate damage to the player selected.
-

Strategy
- This is a fairly simple encounter that revolves around keeping the small real estate you are given free of Azerite.
- Start the pull in the middle of the room, moving to the space that has the greatest overall area to stand in. Tanks should pop something on pull as she does much more damage than you think she will.
- When the Azerite Catalyst comes out, try to place the pools as close to the old pools as possible.
- Tank the boss close to the old pools, and when a player is selected by the Propellant Blast, they should do their best to intelligently clear the Azerite from the encounter space. By the end, the platform should be almost as free of Azerite as it was when you began.
Trash to Mogul Razdunk
Some changes to this area have made it incredibly frustrating to play. The Crawler mines in particular are a questionable design decision. You will mostly be doing small pulls against larger mobs.
- Crawler Mine - These are buried in the ground all around this area, and will activate if any player comes close enough. These do nothing but fixate on a player with Seek and Destroy, running towards them. They have relatively low health, and if they make contact with their target they will deal lethal damage to them. These can be CC’ed, but move quite fast.
-

- Venture Co. War Machine - These are lieutenant mobs, and have two abilities. The first is Charged Shot, which deals a moderate amount of damage to random players. The second is Deploy Crawler Mine, which spawns one of the Crawler Mines buried around the area.
-

- Ordinance Specialist - You should not need to pull one of these, but if you do, these have a single ability called Artillery Barrage, firing large swirlies that deal lethal damage to anyone caught in their indicated area.
-

Mogul Razdunk
This encounter has mostly been updated visually, with some slight changes thrown in to increase the amount of things to dodge.
- Alpha Cannon - This boss does not melee and instead casts this, which is non-interruptible and deals relatively moderate fire damage.
- Summon B.O.O.M.B.A - Razdunk will command two drones to fly to locations perpendicular to each other. A short time after they reach their destination, they will fire a massive barrage of missiles down the areas they are facing, dealing lethal damage to anyone caught.
-

- Homing Missile - The boss will select a random player, firing a missile that slowly moves towards them. This cannot be avoided and detonates in a large radius dealing moderate up-front damage and applying a moderate DoT to anyone caught in this blast.
-

- Gatling Gun - The boss will begin a cast at the tank, firing his Gatling Gun in a cone that rotates clockwise or counter-clockwise quite quickly about himself, dealing lethal damage to anyone caught.
-

- Configuration: Drill - At 50% health, the boss will shield himself and ascend out of reach of players, becoming immune to damage. He will then summon two Venture Co. Skyscorchers, which do nothing except hop about the battlefield and cast Buster Shot on their main threat target. The boss will not exit this configuration until all 3 stacks of Configuration: Drill have been removed.
-

- Drill Smash - Razdunk will select a player, attempting to smash them with his drill. The player will have a good amount of time to run to one of the 3 pillars around the area, highlighted in red, and if they are successful Razdunk will smash down on one of them, removing a stack of Configuration: Drill. When he attempts to smash the player, anyone caught in the indicated visual will take lethal damage. The entire party will take moderate damage each time he casts Drill Smash.
-

- Configuration: Combat - The default configuration, and what he will return to when Configuration: Drill is complete.
Strategy
- The tank should begin the fight in the middle of the room, keeping an eye on the B.O.O.M.B.As as they fly around. When you have determined where they will fly to, head to the area that does not overlap with their sight lines and pull the boss deep into that area.
- The Gatling Gun will have some very awkward overlaps with the missile barrage from the drones. Simply do your best to get to each safe area as soon as possible, and always try to aim the Gatling Gun towards the edge of the arena to start. If you must, leave melee range of the boss to get to the safe spots.
- The Homing Missile target should move to a location where there are no players around them, while the other players also move away from them, and then the missile target should run into the Missile to detonate it so they can return to the team.
- During the Configuration: Drill, the tank should pick up both of the Skyscorchers as quickly as possible. DPS should kill these while paying attention to the locations of the pillars so that when they are selected for Drill Smash, they do not waste the opportunity. Once the boss begins moving towards you, you may move away from the pillar. If you wait until the boss is above you, you may not make it out of the Smash itself, and be one-shot.
- Once you exit this phase, you simply need repeat the standard phase until the boss is dead.
Routing and Lust Recommendations
You will want to Lust on:
- First Pull
- Azerokk
- Mogul Razdunk
Here is the route I personally prefer, which goes right in the first area and also pulls all the Laborers available in the first pull. It can be quite scary at times but I feel once you’ve learned it, it is easier overall.
!nAv2YTjmu0VL8d0bTJEpD6wAsNGBFKji4scTetghi15L8Txqc0ILCM(cww6OJo3vPsu5UYIb1VH6XNNhoww00122vp1p(A51OSpKvw8xa(t51KLHVu1pblBPE6Wby)4Lt7Vhg2)LMJZGXA0pd9ZK1nS3q3kWFm13pdzbWiap2T)(YR1Wp01oEtB7ZW25)0mYLHAWZ)Gn)S8pZhS9dX(HQxvpjtpuplxpCzTrdeFEgnRBNIAPfXmlt8wMyx1qxr9q)WHYcwLKJPlOXjKBcIywI4X6cBMIfj1TJtWBuuShNbhh3zcIewym5NZQYZOcvLN68pgsMla4yHGt4MZsOcxmCDzRTPQbc2tI(hk2jvm1jDMn4J5oVRWg8X5juGlbsNM4uqMklNs9W7h4qofGCkaHJpaPzQa57L5MiildKrJScbOfmIeYaf7NtyK8ynGKonKfRbrGgQyz0m2cM8ejAUmauECkUmwHHK3OAyT6iTmHbMiPzTosC26IkcTHPJC6TVZk7eyBfCjxZhATfJmUeCJMeDCgxJ6H7WAByISH6dsEsb3PSh1rytwE7yJ9Aeqn1iism7clt5jykEvFRiSbaxWfkqdAlms)V7dtTwfZwiUzASKSqcAg5KHK1qvc)nkFNkYtn44cDtlY0PfuoppxeakoFZKVN2n4OcuGQMOHVsbo6AHG8jSFba2jBSNJX5AXS40gdiHftUfI05(TT35zqvLV5GrjQadfDUZzkDT)qUBFjUBFdDheaAmL7O1Who7SPbJNkMuAj8kyQuL1QbTslMEwWagOgtF7uWS46tm)KkdF9zVTOI3k5(IlGkEcQcBdkWvmZL5BXFm7DQxTUtQuMRBnVzN4Z3yKQAfzl2R7PyftQE4fO3cDeoo)D3dWB399B295pE7v3C5hV4I3UBh84tdhQo86B3D7W0iuw8yt3YR)ApaWdd9nFDOBp0uQCZS(gpfC)uxV(vERhYuxtzXVU6f4NKUJh)2NMNR8FaThis is a route which goes left and doesn’t deal with as much trash in the first area, and makes up for it with more trash in the third area, which is easier for some groups. The skip is a little harder to perform in this route, so you may simply choose to engage the Peacekeeper and pull less in the third area.
The below is an MDT (Mythic Dungeon Tools) string, and can be copied and pasted into the addon in-game.
!9z12YTjmq0VL8d0rA1n49KP3sD6eC7Jm2alo0smziqQZl(BVacqsiiVidw7LZ5ODxrmnEFCuvYFW0Mx7ESjokRipViTTS594DuYNiXr)dX)gVJ1)4BhlBXExsBRRXZn32E(ewD(Rzx6mggS(vSSlyfvN1HB0WF2ww2zsVbni(CX5tX7gmVUiV5H88xXP8)sNL9poyC3pG(N(36sr)6WcThpdGAhL3VoSqfDRn6xMDA2hqVP0EtHjIC92mRT5Z7AsNofrPvLv1XreMqc0E)gbQT7sDeflqtZcwjnyqTceDYxy(rrO0cN2bNnhiUJtkKic4wcJt6P(8w5lJCFU4QePhZrL0Yg7ag4hqdRf(K2v4xKxPtEPPanbTcGd5igTnWuXeAYbXN9H(Gv5JcLdkcKP0GJ92O8zpL4ZWrsR28KgesEwsVnbABc20ufjHeoibHABcTmDSQFad7x2omjVuWZJPGZKmjI2HiCrj3YOB6PgBaOuppMRAKywEUTrHl0yDKcwjs(7cEfSM(ujWeogT9qcRUDZSfX8I0MAIvJcZPD0adPmha1GJmF6szEtJCi8Y5FnJdpwVQiNqPbdnKZu1VAt3wS1SYzylsH8eB(cW6trhHfyx(dgydwcJrAbJ2YMfy(8rSy6iwVrOp(4DDajGTEa0v6)CbDGrmh74bYM1pjPc2OcOwtbOREZ0YojfsP2IUdk9ABCZaFfLLzvXzv3zQCzwkRlHakQW0bWmwc6WEQ3jkDLBXGnl(oMssOCBrf4BAmIsU(4BklGWFgd8rxqmFBaMWjj2Gd8V6WnuUdYrIIOVRCsPbXhmZzYTmjh49nBMV5jQnPeFdlNzBdEPBD)t41d)4H9F5UhV)HBV7MBUEyp(8lv1hRF)6HhRABW4ONZk6)mR8AeFQQm7BvfNXS4eZ)m(Xuj4P2IYHpNAmjTfzXr)((3WFXkUC57FU7)I)p
Skips
Listed here are demonstrations of any pertinent skips I am aware of.
- Right skip around the first Peacekeeper. You basically want to jump towards the little inside corner of the fence pillar.

- Left skip around the first Peacekeeper

- Hugging left side to avoid all trash (requires Imprison, Sap, or similar effects) in final area.

Profession or Dungeon Buffs
- None I am aware of.
Respawn Locations
- Entrance
- 1st boss
- 2nd boss
- 3rd boss
Table of Contents
- Operation Floodgate
- Darkflame Cleft
- Operation: Mechagon - Workshop
- Rookery
- Cinderbrew Meadery
- Theater of Pain
- Priory of the Sacred Flame