Published
- 21 min read
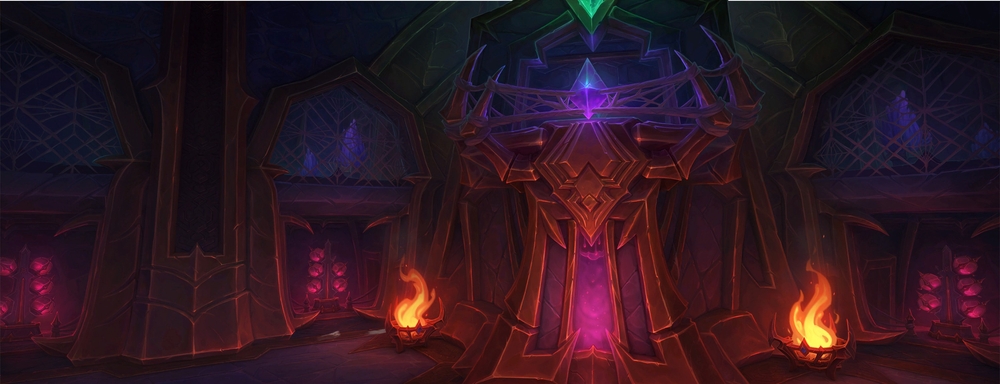
A Complete Guide to the City of Threads (War Within)
First Boss Trash
Sureki Silkbinder -
- Web Bolt - Spammable Moderate damage cast
- Silk Binding - Short cast that turns into a channel, while channeling the target is stunned. Will recast if you use a stop on the cast portion, but won’t if you stop the channel.
- Very annoying to group.
Sureki Venomblade -
- Venom Strike, just damage on the tank. Usually cannon fodder.
Battle Scarabs -
- True cannon fodder, dies instantly
Royal Swarmguard -
- Lieutenant mob
- Scary when pulled with other scary mobs, but mostly doable
- Earthshatter - Frontal cone thats fairly wide but plenty of time to dodge, just don’t be too far

- Ravenous Swarm - AoE ticking damage on the group that does a lot on higher keys/fort. Be careful of other damage intake while this is out

Herald of Ansurek -
- Lieutenant mob
- Lots of kicks required, can be quite scary with other mobs
- Twist Thoughts - fairly long (3.5s) cast that the mob spams, targets one player and does a fair amount of damage to them and anyone around them, leaves a pool that does a lot of damage as well.

- Shadows of Doubt - Prideful-like DoT that shoots out balls in a star pattern when it expires or is dispelled (magic). Mechanic from the first boss. Get your position early and stand there so people can see where it will go. Getting hit by the balls stuns you and deals a large amount of damage.

Orator Krixvizk
Abilities
- The boss will surround himself with a circle with a rather small radius, similar to the miniboss in Streets of Tazavesh. When you leave that area, you suffer a large amount of damage and are yanked back in by Chains of Oppression.

- The boss will frequently cast Subjugate, a tankbuster that deals a high amount of damage, especially on tyrannical. He will typically cast it after Vociferous Indoctrination, and before/after a Terrorize.
- Terrorize - Frontal cone aimed at a random player. Likely a one shot if you are hit by it. Also fears you so its likely you will run out of the circle if you survive and then you will most certainly die without a massive heal or DR.

- Shadows of Doubt - Same mechanic from the trash, except two people get it. With the reduced space, it can be difficult to see where both players are due to the bosses model and spell effects.
- Vociferous Indoctrination - The boss will channel for a few moments, dealing large AoE damage before leaving a puddle at his feet that grows and persists for around 2-3 minutes (will update with exact time when I learn it). These puddles themselves deal nearly lethal damage and force you to move the boss.

Strategy:
- The tank should pull the boss from almost melee range, ideally with the group stacked on him and running in together so nobody is pulled. At that point, you should choose a corner of the room to start from, and each Vociferous Indoctrination you will move it just enough so that the boss is not directly overlapping the Indoctrination puddle and people can freely move. When moving the boss, you should ping the direction you are moving in every single time, and as a DPS/Healer when he is casting Vociferous Indoctrination, you should pre-stack on the tank to reduce the chance you are caught off guard by his movement.
- For the Shadows of Doubt, both players should find a spot and plant, and the healer should dispel one of them within the first two seconds. Pay very close attention when these balls are shooting out, as getting hit will one-shot DPS/Healers typically on higher keys. If you live, you’re stunned for a few seconds, but usually there’s enough time in between mechanics that this will not result in a death.
- The Terrorize cast happens typically just after an Indoctrination movement, and during the Shadows of Doubt, towards the end of the DoT. This means the person whose Doubt is naturally expiring might have to move as their balls are shooting out, so you should pay special attention if that is the case.
- It is important to note that, while the boss does do a good amount of tank damage, most tanks can live it without healing as long as they manage their CDs effectively. There also isn’t really much damage going out besides the Indoctrination casts and the Doubt DoT. On the Beta, it was very common to finish the boss with one or more players dead for a majority of the fight. If you lose someone early, you may notice the fight just feels easier, even. Not saying you should kill anyone on purpose or anything…but, if someone is annoying you…you know what to do.
Spies, and You
You may have already heard that this dungeon is similar to Court of Stars for the second area of trash alone. It’s sorta like the spy mini-game at the end of Court, but with a lot more combat. Although, you’ll be happy to know it’s way simpler and can be gamed and optimized in a way that doesn’t require a lot of brainpower.
I’ll try to make this as simple as possible with the following illustration.

So, it’s important to bear in mind that you’ll need 4 Eyes of the Queen dead to progress to the second boss. It’s also important to note that the NPC you need to speak to is located near one of the Eyes of the Queen spawn areas. So, you want to path throughout this portion of the dungeon in a way that is most efficient, and so the above “route” is the best way to do so.
To make things easier, Blizzard has made little trails of purple “ghosts” representing the path you can take to find one of the Eyes of the Queen.
The way you typically path, however, you won’t need to rely on them too much, although they’ll make the spawn point more obvious the more you get used to this mechanic.
So, immediately upon entering the area, once you’ve been granted the pheromones buff from the NPC guarding the bridge, the first Eye will be in front of you. After killing it, you should go left, and if the pat is bad then you go behind that first house on the left, and path to check the first spawn point. Even if you immediately see ghosts upon entering the left spawn area, you should still check the closest spawn point. At that point, you should have an idea of if it’s behind the main house there, or inside. Path towards whichever one you have deemed it to be, although the safest way is to just make the full circle around the back.
Also, if you get a particularly terrible pat, you can sacrifice one person by having them intentionally get seen. Only one person can be sent back at a time by one guard, the others will be able to safely cross past. Best to do a DPS, unless you have a lot of CDs, as the Void Rush by the Eyes of the Queen does a fair amount of damage.
After clearing the left spawn, you should head to the back left one, hugging the left side to check all spawn points along the way. Once that’s done, head across the map to the final Eye, and you should send the healer out to the NPC once it gets low and party is topped.
With that done, you’ve completed the area and are ready to fight the second boss, but before that I’ll quickly go over the actual mechanics of the trash here.
Second Boss Trash
Xeph’itik -
- Miniboss guarding the bridge
- Web Bolt - Kickable spam cast in between other casts
- Perfume Toss - The boss will do a short cast and toss perfume (shocker) and if you’re hit you will be disoriented. Not super threatening.

- Gossamer Barrage - he boss will channel for a few moments, shooting out a volley of webs. They deal high damage and root you if you are hit.

Eye of the Queen -
- Lieutenant mob
- Void Rush will pick 3 targets and apply a high damage DoT to them for about 6 seconds. Not a bad thing to personal.

- Null Slam will have the NPC go untargetable for a few moments. It’s not invisible, as you can see it skitter away to a different position, and from there it’ll cast a large cone towards a random player. Assumedly, it’s a one shot on higher keys, although it is an incredibly long cast.

Agile Pursuer -
- Spam casts Knife Throw, a rather high damage cast on random targets. Can be stunned, but it will continue to re-cast and it is not kickable. Can combo with Void Rush to be lethal.
Web Marauder -
- Extra tank damage through the Rigorous jab cast. Applies a stacking debuff that increases the damage received by the Jab by 10% a stack. Rarely gets high enough to be threatening.
Covert Webmancer -
- Mending Web - A short cast that heals their target. Nothing else to kick, so this should be kicked every time.
- Unsure if it can be stopped without it recasting. Will update when I know for certain.
Nx and Vx
This is where things start getting tough on Tyrannical and high keys. Mechanically, it’s not that difficult, but there is a lot of damage going out to everyone and good personal usage and cooldown management by the healer is essential to overcoming this fight.
These bosses share health, so cleave is quite good, and you’ll want to keep them grouped as much as possible.
Abilities
Vx:
- Vx is ranged and does not move except for when he teleports randomly and during Synergic Step. When he teleports, it’s generally near a ranged player unless there are none, and then he will simply teleport randomly fairly close to the party.
- Synergic Step - When the bosses reach 100 energy, they’ll come together and channel briefly before casting this. They’ll launch a series of lines indicating the direction they’ll dash, dealing damage to anyone in their path. It isn’t lethal, but any extra damage you take on this fight puts you more behind. Dodge it as best you can.

- Knife Throw - Vx will cast this on random targets, dealing moderate upfront damage and applying a nasty short duration bleed. Very dangerous when you have this and other debuffs.
- Ice Sickles - Vx will prep several frost daggers around himself, one for each member of the group. Everyone should spread out so that they only take their own dagger. Taking more than one is most certainly fatal. You will also be slowed and take a nasty DoT after it hits you, as well as take upfront damage upon application.

- Rime Dagger - Vx will cast this on the tank, dealing moderate physical damage and applying a debuff to them, then dealing frost damage to all players. Other players must gather on the tank until the circle on the tank is gone. The tank will take large ticking damage until the debuff, Freezing Blood, is removed.

Nx:
- Nx is melee and attacks like a normal mob would, following the target with the highest threat. Try to keep him on top of Vx as much as possible for cleave.
- Shade Slash - Nx will cast this towards the tank, dealing damage in a cone and leaving a Shade behind. These Echoing Shades will repeat his Shade Slash when Nx casts it again, but they do not leave successive Shades. Only Nx does.

Echoing Shade

- Duskbringer - Nx will do a long cast, dealing AoE damage during it, and there will be a large purple circle around him. Upon completion of the cast, he will blast anyone still in that circle for high, most certainly near lethal damage. His shades will have similar circles around them.

- Shadow Shunpo -Nx will teleport to a random player, dealing damage and applying a nasty DoT to them for 8 seconds.
- Dark Paranoia - Nx will afflict a player, preferring ranged, with yet another nasty DoT lasting 12 seconds. If the Paranoia target runs near anyone, they will deal damage and fear them.

Strategy:
- The biggest thing to bear in mind is that the bosses will start in Nx’s “Phase”, and rotate after every Synergic Step, as of current information. This means you will not deal with Rime Dagger or Paranoia in Nx’s Phase, but will in Vx’s.
- So, there’s obviously a lot of mechanics, but it’s overall fairly simple to execute mechanically. The basic gist is to keep them stacked and dodge each mechanic as they come out.
- As mentioned before, personal usage is crucial here, and you want to make sure you get the best use out of your defensives. I generally recommend popping something for every Ice Sickles unless you don’t have a lot of personals, in which case I would save them for a DoT overlap like if you get Knife Throw + Shunpo before a Sickles is coming out. It is also notable that Ice SIckles occurs with Duskbringer, so melee will need to be even more aware of their surroundings.
- As far as micromanaging Shade locations, this isn’t something you should focus on, as keeping the bosses together is more important, but if you can line them up together without sacrificing boss position, then do so.
- You want to be pre-stacked on the tank for every single Rime Dagger. The tank should also pop something for each one. Magical Immunities will prevent the ability from being applied and basically ignore the mechanic (you should AMS the second one if you are a DK for example.). I believe Spell Reflection should work but am not sure. The second Rime Dagger overlaps with a Duskbringer, so you should be ready to move with the tank as well.
- Save movement for Synergic Steps. It’s not really too hard to dodge, but sometimes you may have a slow from the Sickles still lingering, making it harder to get out of the way, and I cannot stress enough that you do not want to take any damage that is avoidable.
- As I said, this is a rough fight to heal, so you generally don’t want to stand in BFE. Be close and stacked as much as possible to make healing more efficient so you don’t fall behind.
Third Boss Trash
Outside
On your way to the Transformatory, there’s really only one new mob type, and a miniboss awaiting you at the entrance to the Transformatory.
Sureki Conscript -
- This applies a debuff to their target (aka the tank, ideally), causing them to take 10% increased physical damage a stack. A lot of these make the pulls a bit dangerous for the tank, but it’s still fairly easy to pull a bunch of these, as they die quite quickly. Note that they make the Web Marauders, which are in this area and apply Rigorous Jab, much more dangerous.
Royal Venomshell -
- Earthshatter is your standard frontal cone towards a random player. Just move (lol).

- Venomous Spray is a channel over 9 seconds. Immediately upon beginning the channel, it’ll apply a high, long lasting DoT, but during the channel he’ll shoot out green swirlies at a high frequency. Dispelling the DoT will completely nullify the damage you take, so if you can dispel poison, you should. It’s very easy for the healer to fall behind on group health if they’re not careful. I don’t generally recommend you pull this mob into others without lust.

Inside
Inside the Transformatory are some rather annoying mobs, but again, not too many new things to learn. You’ll notice a bunch of webs everywhere. Touching these will spawn an easy to kill mob that doesn’t grant count and just wastes time, so you should avoid doing so.
Unstable Test Subject -
- Lieutenant Mob
- Fierce Stomping - He’ll channel for a few moments, dealing AoE damage over the course of the cast to anything within 20 yards.

- Dark Barrage - It’ll target random players and spawn swirlies, dealing damage to anyone hit. Fairly easy to dodge, but also not that lethal.
Sureki Unnaturaler -
- All these will do is keep trying to cast Void Wave. It does a small bit of damage, but it also knocks you back quite far. Using stops just causes it to recast, but if you have enough you can kill them without needing to individually interrupt everything. The most annoying thing is that you can also get knocked into a nest of the webs, spawning a bunch of extra adds.
Congealed Droplet -
- Cannon fodder that you have to kill to spawn the third boss
The Coaglamation
Overall a simple boss, focusing on space management and raw healing, but it can be a brutal check if you’re not prepared.
Abilities
- Viscous Darkness - He’ll do a fair amount of damage and knock everyone back, then spawns a few waves of orbs that will attempt to reach the boss. Upon reaching the boss, they’ll heal him for 7%. Not a wipe if one gets through, exactly, but this is a fight that gets harder as time goes on. Absorbing an orb will spawn a pool at the location you soaked it, as well as apply a healing absorb called Corrupted Coating to you.

- Oozing Smash - A tankbuster that deals a fair amount of damage, not necessarily requiring a defensive. You should aim to be topped for each one. It will reduce your healing received by 30% for 10 seconds. You shouldn’t soak too many orbs while you have this unless you have something rolling, but also prioritize soaking orbs if DPS are slacking.
- Blood Surge - The boss will do a short cast, doing a large amount of damage to anyone within 8 yards and leaving a pool that will slowly grow larger. This ability doesn’t have a lot of visual noise, and as this is a slower paced fight it’s very easy to get caught off-guard by this.

- Dark Pulse - Upon reaching 100 energy (about two ability cycles), the boss will do a channel over several seconds, dealing very high damage. This is where your group-wide DRs and personals are best used, as you will certainly die if you go into it dry.

Strategy:
- You’ll want to pull the boss to one corner of the room, and position everyone spaced out equally around him. You should aim not to soak any orbs coming from the middle, or places you might move to, directly in those sections. Rather, let the orbs come close to the boss itself before you soak, so that you consolidate the pools in one clump.
- The only time you shouldn’t be in melee, even as ranged, is for the Blood Surge. When the Blood Surge comes in, you should move the boss towards the next area you intend to fill in. If you yolo space management on Tyrannical or higher keys, you will quickly find that you basically have no room to maneuver, making soaking harder and increasing the chance the boss eats an orb.
- Dark Pulse will usually occur while there are still a few orbs on their way to the boss. The players soaking those balls should really take care to watch their health. Immunities are very good on this fight as they allow you to soak without receiving the healing absorb, and you should rotate them each wave if available.
Fourth Boss Trash
Following my PUG route, you’ll only pull one pack, and that doesn’t have any new mobs, just some Unnaturalers and a Test Subject. Deal with them as you did before, and you’ll come to the final boss room. To summon the boss, you’ll need to deal with two minibosses, which can be pulled separately and each have a major mechanic from the last boss.
Elder Shadeweaver -
- Web Bolt is a spammble cast. Kick when you can.
- Umbral Weave is a short channel that, when finishes, roots all players in place. The only way to free yourself is to destroy the web that binds you, or use a movement-freeing effect.

- The miniboss will use Shadow Shield to protect itself from interrupts. Breaking it allows you to once again kick Web Bolt.
Hulking Warshell
- Ravenous Swarm is similar to the Royal Swarmguards from the First Boss Trash section. A moderate duration channel that deals high ticking damage. Good point to personal if you feel threatened.
- Tremor Slam will have the miniboss start a cast that will do damage to all players and additional, lethal damage to anyone still near it when the cast completes. Shortly after, several scarabs will spawn that the tank needs to pick up.

- Again, you can fight each one separately if you pull the first one away from the other. They become active shortly after walking into the room, with the second activating shortly after the first is engaged. I do not generally advise doing so without a clear plan and without desyncing their abilities so you don’t get bad timings.
Izo the Grand Splicer
This is, in my opinion, the hardest boss of all Season 1. Mechanically it isn’t too intense, but the sheer amount of damage this boss outputs on higher keys is quite insane. Judicious use of personal defensives, group defensives, and synchronous movement as well as smart use of damage and utility is required to survive and conquer this boss. On top of this, it is also a massive healing check, even more than the boss before it.
Abilities
- Splice - The boss will cast this fairly often, dealing damage to all players over 6 seconds. The main source of damage in this fight, and keeping yourself healthy enough to live the ability that usually comes right after it is what makes this fight so hard.
- Shifting Anomalies - She’ll summon three orbs that deal very high damage (one shot on higher keys) and knock them back. They’ll remain static upon spawn, forming around the boss, and then move periodically, around every 7-11 seconds.

- Tremor Slam - The same mechanic from the miniboss. She’ll do damage to the entire party, and one-shot anyone still near her when the cast finishes. Then, she’ll spawn several scarabs the tank will need to pick up.

- Umbral Weave - The same mechanic from the miniboss. She’ll do a short channel that, when finishes, roots all players in place. The only way to free yourself is to destroy the web that binds you, or use a movement-freeing effect.

- Process of Elimination - She’ll gather all three orbs and place a circle around the tank. After a short cast, she’ll throw them at the tank, dealing high damage over three hits. You will need to pop something for this cast, and anyone near the tank will be likely one shot.

Strategy:
- Ranged should stay together upon engaging the boss, and the tank should engage the boss where she lands. After the orbs spawn, move the boss towards the ranged, and with every shifting of the orbs, everyone should pay attention and move backwards together, slightly spread to minimize downtime but also so that you are still stacked. Ability order is random, as of now, so you should prepare for a Tremor Slam or Umbral Weave shortly after the first Splice.
- You should use something if available for each Splice, although remember it’s a DoT so things like Zephyr don’t work on it. It is vital that you are at least 75% HP before a Tremor Slam or Umbral Weave, otherwise you are likely dead.
- If it’s Tremor Slam, everyone should move out together, and prepare for an orb movement while the tank gathers the adds. The adds are very low prio, and you should just cleave them down while focusing on the boss.
- When the Umbral Weave comes out, you should all pixel stack and precast AoE to instantly break yourself out. Failing to break yourself out in time, will result in a guaranteed hit from the orb movement, likely killing you.
- After the boss has done both abilities, she’ll cast Process of Elimination, briefly clearing the room of orbs. This will give you a brief respite from the onslaught of damage before the cycle begins again. Shortly after she’ll spawn new ones and the fight will repeat. Simply follow the same strategy, dealing with whatever combo you get.
And that’s the City of Threads! Hope this helped!
PUG Route and Lust Timings
Here’s the route I recommend you use.
!fA12UXjmq0VOTY3X(1QkvLwjALOpJexgNqlzjIfs283xW2yZnN8YUG9XNz85mJn548)KN1v(xOA420Jd5z1nADt1y7W75PKVGYZEdG)LNYMF81I2ryEfvJ99W1HVnE9rO76d13ZtXydKBq7exnDxTS5a(7X22jiZaga45MRpMNIMFRVrp8lT(gSe(xMqo)Ob82)sPZ)mNtMSzW(C0jPRMeBhcJwngZVaUF9c)ejMvKv1121pjkyktW2fYfI4htg3qSpjfK(uq5tbdGqK5mOOsUB)SMt76toMdB3b4eUuP2LuEEcjcwDKjm9OIMCMIgOHf2q8DBieOv051YTlL(X6g)Karu(arr(ard2kDLVgmwQ3ztPCV(tfbdiX7aPuZKyBTLzwSDNH8sskZkpgAzw5ZWlZ6K2Qj22kjfuOnvsIJ(qyB5Qc2io0tuI9oNRnafkW9IykHSjtKeeT2WyIJq1HYvVPLOk4gSslgEuO10kPSCgQJoruOjtTvu1690AS2S1NCR6HKrzSGR0LjggXhzKEKrxqW4OuwvqaKfe5iLSJuspMKNfLTMHsP0uliNLtINsmcHxWnGx6uiNEQaj0B4liwo68dCWsPSW0HI5NrppuYjchBL4JGPMCFi2TDLingBcH4SqeAeiH(BYQJTd93Kq)nj0Ftc93eXjPZ2MsUQscMAw8ItsJkpahX1wRAXJzX7HDQZYP)8tUrqe9gHqqPcOelmWDTvQpXX9MTvM4Evs4fPeFeL(mxT(0hSi6fSUZ29Vk8VU9EhevjzMAvIRhNexAjqbVsBaJprA)8BSt92(EXMU9SpiPGyUvLSu3LeVDdQfvMJP8PE8tGq8sMTrM4sDcjk4YQcobMgi8LszJLTWRqRh6aCFE2MH3V0PVm8upuuF7Ya88lD9f9VFPVBCaYZEUUz(dZ09a8uxB9p6AUc15LHrCF(vj84ytR5dWCbySPopti(kQ5nY97)87tJL)Fa
And here’s a route I think a more organized group might enjoy.
WIP
Lust Timing You should lust either:
- First Pack
- On CD
- On CD/Third Boss
- On CD (if applicable) Or
- First Boss
- Second Boss
- On CD
- On CD (If applicable)
If you’re really scared of the second boss but still want somewhat efficient lusts
- Large pull in First Boss Trash area
- Second Boss
- On CD
- On CD (if applicable)